One of my favorite foods to prepare on the grill is steak. Fresh, red, dry-aged, American beef! Steak can be mass-cooked and served at parties, or it can be prepared neatly for a romantic dinner at home. If you're a meat-eater like me, steak is probably one of your favorite foods!
While the grill is my go-to method of cooking steak, I had been reading more and more about the reverse sear. The reverse sear is a more precise way of cooking steak to any desired rareness. It also leaves more of the steak at the desired rareness, creating only a very thin band of well-done meat on the outside. This video does an excellent job of explaining the reverse sear. If you have about 3 minutes, give it a watch!
The Cut
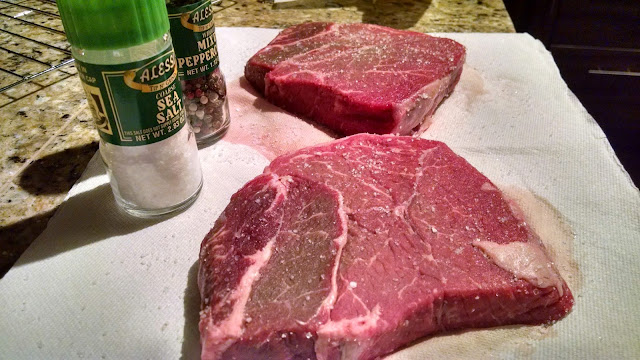
Unless there is a special occasion, I usually get my steaks at the grocery store. My favorite cut of steak is the boneless ribeye, especially one with lots of marbling! Ribeye steak has a really nice balance between juicy fat and lean, tender meat.For my first reverse sear, I didn't want to use a prime (expensive) cut of steak. So, I walked over to my local QFC and picked out the nicest cut of top sirloin available.

When it comes to steak, top sirloin is my favorite option for budget eating.

The Gear
I used the following items and ingredients from my kitchen:- Sea salt
- Coarse pepper
- Olive oil
- Elevated metal rack
- Baking sheet
- Cast-iron pan
- Stove
- Oven
The Prep
There is little difference in preparing steaks for a reverse searing versus a grill. I decided to add salt early on in the process to draw out water moisture from the meat. I read about this technique from this article by Steamy Kitchen.- Pat down the steaks with a paper towel or cheese cloth. Make sure they're nice and dry before seasoning.
- Season both sides of each steak with a heavy dose (or light, depending on your preference) of coarse sea salt.
- Let the steaks sit out, covered, at room temperature for roughly 30-60 minutes. They will gather more moisture at the surface as the salt draws water out.
- Once the steaks are closer to room temperature, pat them down once more and season both sides with a generous amount of coarse pepper. Freshly ground, if possible.


The Reverse
The heart and soul of reverse searing is the "reverse" part. By using slow, indirect heat, we can bring the steak to its desired rareness more precisely than when using the grill. This phase can be quite variable. Depending on the thickness, cut, and initial temperature of your steak, the length of time and temperature in the oven will change.After reading many different posts over at Reddit steak, I decided cook the steaks at 250 degress (f) for 40 minutes.
- Preheat the oven to 250 degrees (f). Get your baking pan ready!
- Place elevated metal rack on top of baking pan. I wrapped the baking pan in foil for easy cleaning later. I'm lazy.
- Brush the seasoned steaks with olive oil (or seasoned butter). I've seen people add various other spices at this point as well.
- When the oven is finished preheating, place the steak on top of the metal rack. Then, place the baking sheet, rack, and steaks all into the oven.
- Let it cook, slowly, for 40 minutes or until internal temperature is roughly 120 degrees (f). Use a meat thermometer for more accuracy, but don't open the oven and check too often.


The Rest
After the steak has reached the internal desired temperature, pull it out of the oven and let it rest 8-10 minutes at room temperature. This will let the juices settle down and spread out within the meat. We wouldn't want to lose all that flavor!

The Sear
Now, comes the part we're all familiar with. Searing the outside of the steak! It's the same basic concept as normal grilling, but the timeline is much shorter:- Get the cast-iron pan to the highest temperature it can get without burning down the kitchen.
- Sear the edges of the steaks by using tongs to balance it upright. This should only take about 30 seconds on each edge of the steak.
- Lay the steaks flat on one side and sear for 30 seconds.
- Give the steaks a quarter-turn and sear on the same side for another 30 seconds. (Bonus: Onions prepared by the wife!)
- Flip the steaks over on the other side and sear for 30 seconds.
- Give the steaks another quarter-turn and sear for a final 30 seconds. The steaks are done! Pull the steaks off the cast-iron pan and put them back on the metal rack (or directly on the plate!)


Believe it or not, the steaks don't have to rest again! Once they are pulled off the cast-iron pan, they are ready to slice and eat.
More, Perfectly-Cooked Steak

Steak is always better paired with the right beverage. I prefer my steak with Glenlivet 12!

Plated and ready to slice. Ready for the moment of truth...

Boom! Perfect!

I finally understand the hype behind reverse searing! After I cut into my steak, I noticed there was so much more "pink" meat inside. There was no gray band around the edge, which usually happens when steak is prepared from the outside-in. Instead, I was left with a really thin, well-seasoned crust with an abundance of juicy, medium-rare meat in the middle.
Give reverse searing a try and let me know how you do!
No comments:
Post a Comment