
A couple of years back, I installed a Rubicon Express 2" Rear Add-A-Leaf kit to my Jeep to match my 3.5" lift in the front. It worked out well for a while, but over time, the rear leafs started sagging more and more. This left the front of the Jeep pointing upwards, giving it a really uneven look.
It felt like a good time to completely replace the old leaf spring with brand new, 3.5" leaf packs! Since most of the aftermarket suspension parts on my Jeep are Rubicon Express, I went with their leaf springs. As an added bonus, I decided to upgrade my Monroe shocks with Bilstein 5100s!
Here's a list of the parts I installed:
- Pair of Rubicon Express 3.5" Leaf Springs (RE1463)
- Pair of Bilstein 5100 Rear Shocks for 3" Lift (33-066868)
- Pair of Bilstein 5100 Front Shocks for 3" Lift (24-188197)
For this post, I left out the installation of the front shocks. To see how to install all the shocks, see my old post here.
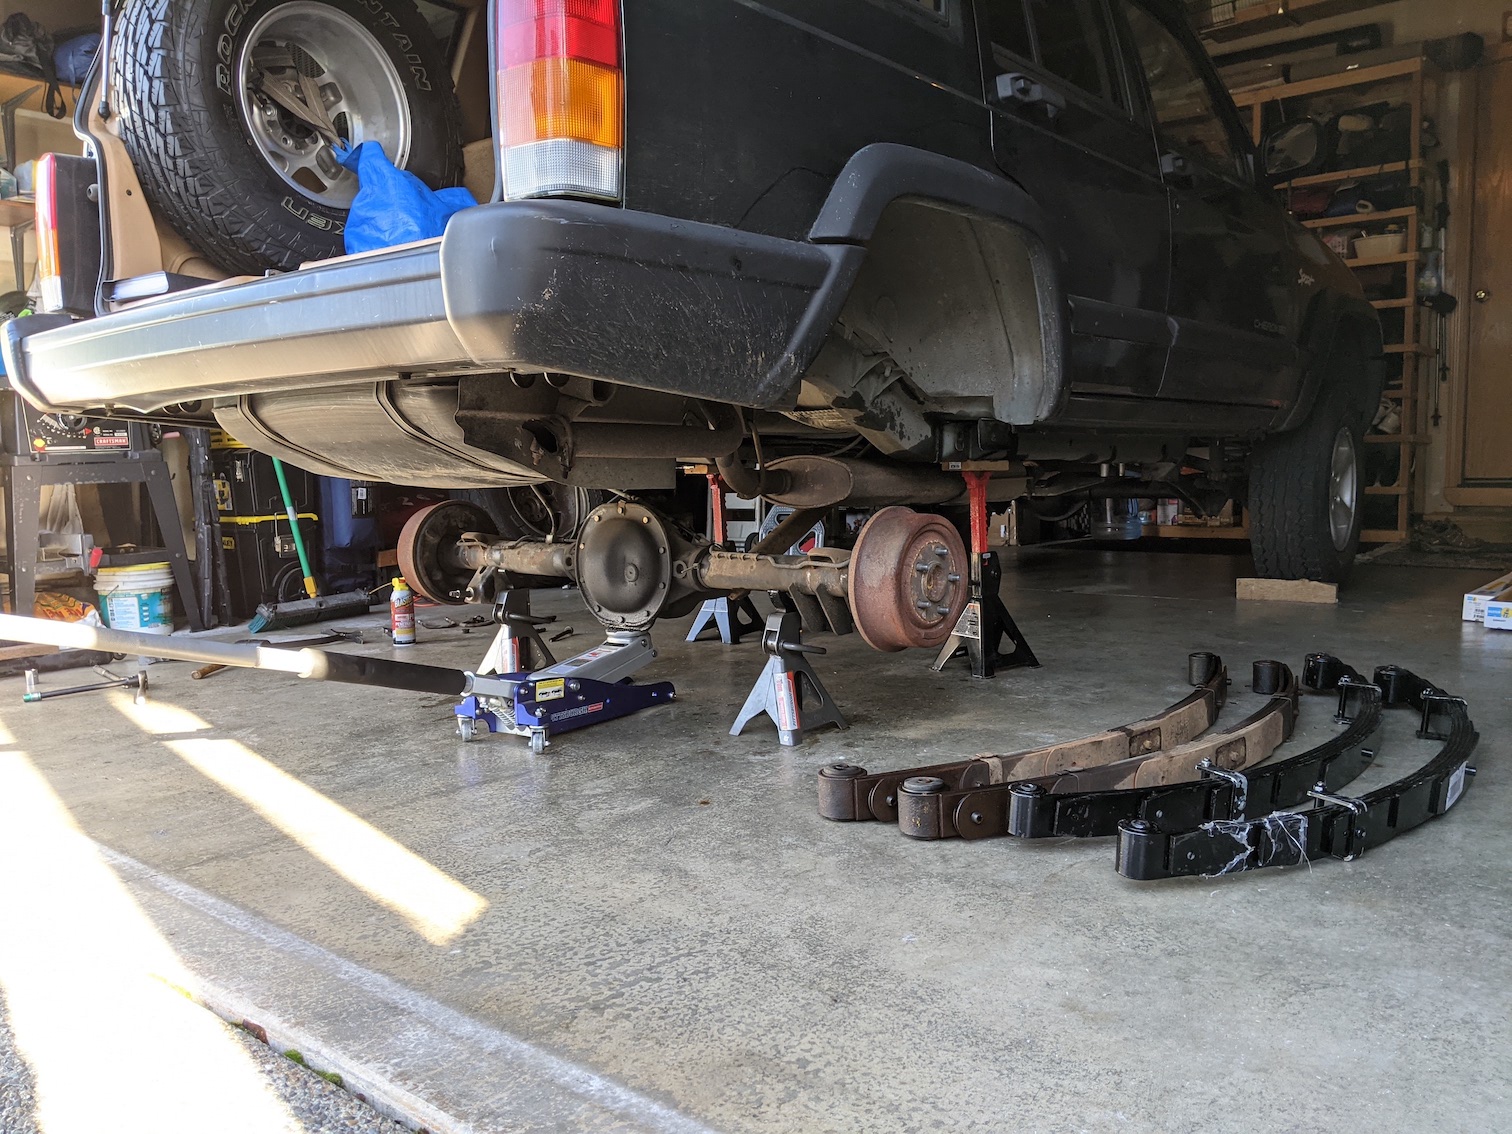
Jack Up the Jeep
Jack up the vehicle and rest it on jack stands. Remember to pad the stands with wood against the frame.

Remove the tires.


Add some jack stands under the axle, just to keep it from falling unexpectedly and snapping the brake lines.

Remove the Old Rear Leaf Springs
The front and rear bolts on the springs are notorious for causing pain.
Some tips:
- PB Blast the bolts about a week leading up to the job
- Spray the bolt heads and the bushings on the leaf spring
- On the front bolts, spray the welded nut inside the frame via the holes around it
- If needed, heat the bolt with a torch until it's red-hot to loosen any bonds on the threads
Things to prepare for:
- The bolt heads can strip, preventing any use of a socket
- The bolt is frozen to the bushing, preventing it from coming out
- The welded nut in the frame breaks, preventing new bolts for the front from going in
If any of these happen, cut the bolt, drill it out, and replace it (new bolts can be found at Rock Auto). If the welded nut in the frame breaks, cut into the pocket attached to the frame and use a wrench to attach a nut to the new bolt. Or, cut the floorboard on top of the welded nut and attach it from there.
Start with the front leaf spring bolt. This requires a 21mm socket.

Use a breaker bar to loosen the bolt. It helps to go counter-clockwise, then clockwise, to loosen it up.


Use a pry bar and a hammer to knock it the rest of the way out. The bolt might be rusted to the bushing.


Remove the rear leaf spring bolts attached to the bottom of the shackle. Two 21mm sockets (or wrenches) are required, one for the nut and the other for the bolt.


Remove the U-bolts. This requires a deep 19mm socket to remove the four nuts.


With the U-bolts removed, the axle is free from the leafs.

Repeat for the other leaf spring.
Remove the Old Rear Shocks
Before starting this, support the axle! The shocks are all that are holding it up at this point.
Start with the lower shock nut. This requires a 19mm socket.


Remove the upper shock bolts. This requires a 13mm socket with an extension.

These are notorious for breaking. If they snap, drill them out and replace them (5/16 x 1.25-inch bolts should work). If the washers in the frame snap, follow this method to wire new bolts and nuts up through the mounts.


Carefully remove the old leaf springs by sliding them off the axle mount and out from under the Jeep.

Here's the rear suspension with everything detached and removed.
Before installing anything, make sure to use copper anti-seize.

Install the new shocks the same way the old ones came out.

Start with the upper bolts, then attach the lower nut.

Use a jack to get the axle-height set to attach the lower bushing to the mount.

Repeat for the other shock.
Install the New Leaf Springs
Warning: The center pin on the new leaf springs are a touch wider than the stock ones.

This can cause issues with the hole in the axle mount.
If it doesn't fit, use a drill bit or file to widen the axle mount hole.


Once the new leaf spring is set, reattach the U-bolts.

Reattach the front leaf spring bolts. Using a jack, adjust the height of the axle to line it up with the mount.

Reattach the rear leaf spring bolts to the bottom of the shackle. This is tricky, since the leaf springs won't line up the shackle without some finagling.
Some tips for getting things lined up:
- Use another jack to lift the side of the axle of the leaf spring being reattached
- Lift until the rear leaf spring bushing is above the bottom of the shackle
- Pull down on the leaf spring and push forward on the shackle (this will take some muscle)
- While pulling down on the leaf spring, slide the bolt in
- If the bolt doesn't slide all the way through to the other side, use a hammer to punch it through
Repeat for the other leaf spring.
Finish Up
With the new leaf springs attached, the job is pretty much done! Tighten everything to spec.


When the wheels are back on and the Jeep is on the ground, go around and tighten things up again.
Conclusion
Overall, I'm happy with the Rubicon Express full leafs. The front and rear of the Jeep stand even and the ride is a lot closer to stock than with the add-a-leaf kit. And with the new Bilstein 5100s, bumps on the road are a little less rough than with the Monroe shocks.
Before

After

No comments:
Post a Comment